
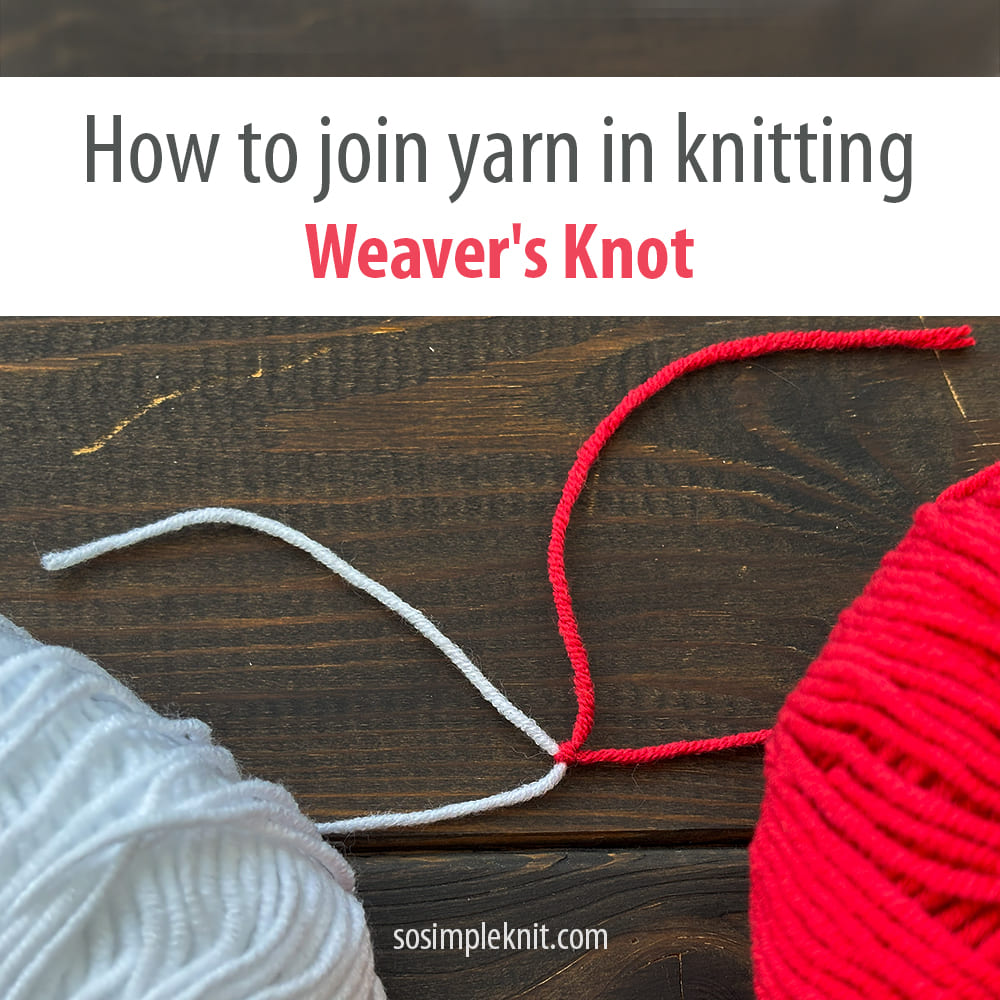
How to Join Yarn in Knitting Using the Weaver's Knot (The Strongest Yarn Join That Won't Come Undone)
Have you ever finished a beautiful knitting project, worn it proudly a few times… and then noticed something wasn't quite right?
This happened to me over 13 years ago, when I was just starting my knitting journey.
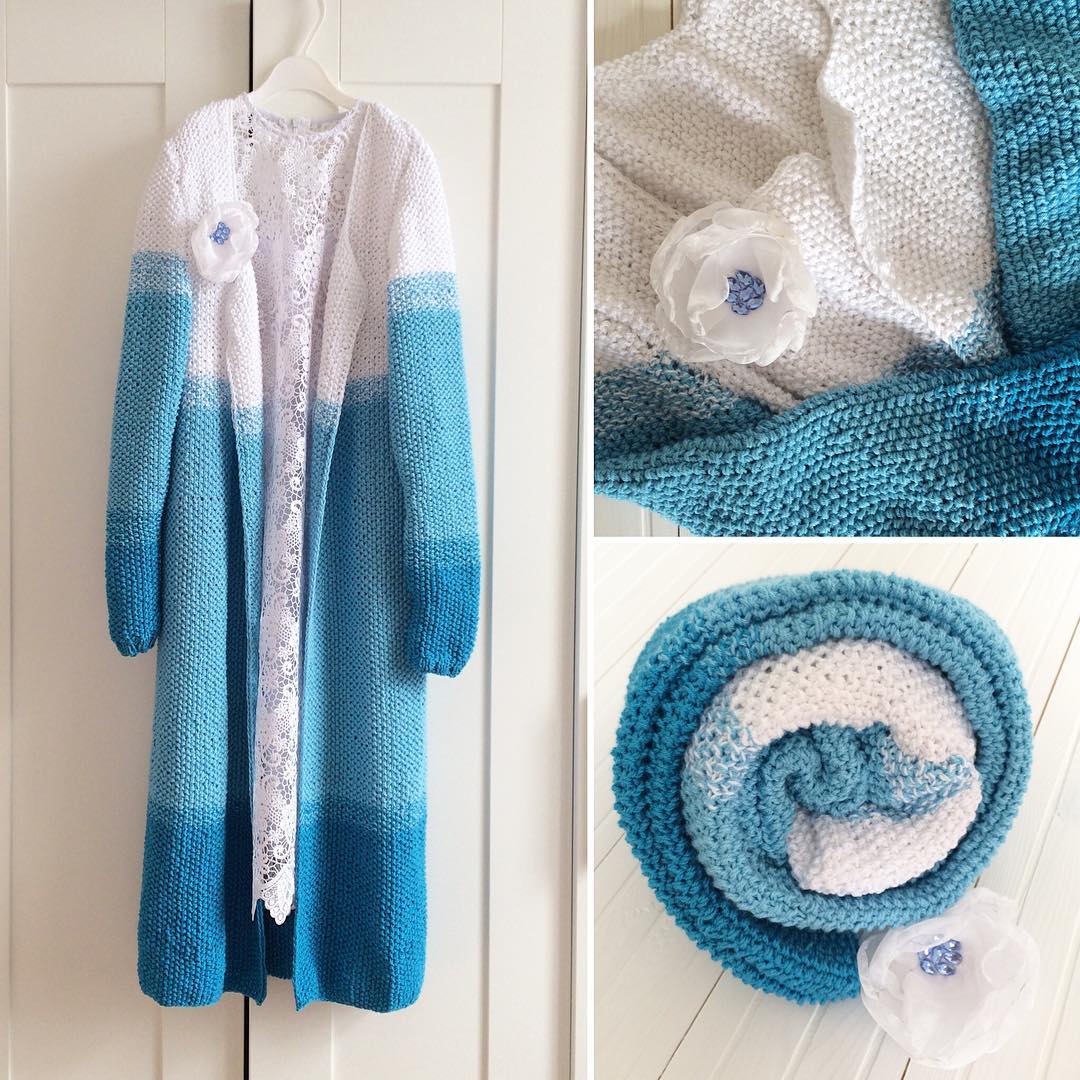
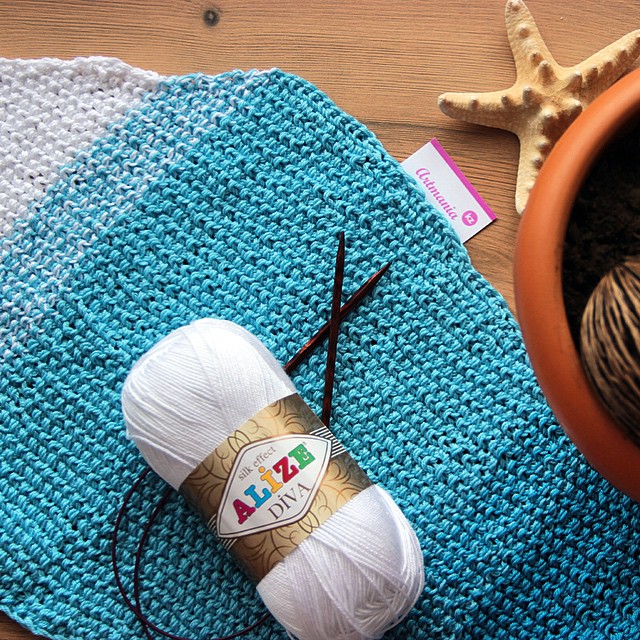
I still remember it like it was yesterday. It was a long, two-color cardigan knitted with a very slippery and heavy yarn — Alize Diva. Whenever I changed colors, I used to simply tie the two yarn ends together with a regular knot. Until one day, the knot came undone, and my many hours of knitting were suddenly ruined — at least a little :)
I started looking for the strongest way to join yarn in knitting, something secure enough that I could forget it was even there. That's how I discovered the Weaver's Knot.
It isn't the newest technique in the knitting world. In fact, weavers have relied on this tiny knot for generations because it creates an incredibly secure connection while remaining surprisingly small. Today, many knitters and crocheters use it whenever they need to join two yarns together without worrying that the knot will loosen over time.
After using it for years, I honestly can't imagine going back.
Welcome to SoSimpleKnit.com
If you're new here, welcome!
I'm so happy you found your way to SoSimpleKnit.com, a place where I share practical knitting tutorials, helpful tips, and beginner-friendly techniques that make every project a little easier and a lot more enjoyable.
Whether you're knitting your very first scarf or your fiftieth sweater, my goal is always the same: to help you spend less time struggling with frustrating little problems and more time enjoying the creative process.
Besides free tutorials like this one, you'll also find a growing collection of carefully designed PDF knitting patterns in my shop. Every pattern is written with clear instructions, plenty of photos, and thoughtful details so you can knit with confidence from cast-on to bind-off.
If you love learning new techniques that actually make knitting easier, you're in exactly the right place.
Now let's talk about one of the most useful little tricks every knitter should know.
What Is the Weaver's Knot?
The Weaver's Knot is a compact, incredibly secure knot used to connect two separate strands of yarn.
Unlike a standard overhand knot, it tightens around itself in a way that prevents the yarn from slipping apart during use. Once tightened correctly, it creates a very small connection that doesn't add much bulk to your knitted fabric.
This is exactly why weavers have trusted it for centuries—and why knitters continue to use it today.
One of its biggest advantages is that you don't need long yarn tails. Anyone who has ever reached the end of a skein with only a few inches of yarn left knows how frustrating it can be.
The Weaver's Knot solves that problem beautifully.
Because the knot locks itself so securely, you can often work with surprisingly short yarn ends, helping you save precious yarn while keeping the join reliable.
For anyone who knits with luxury fibers such as merino, cashmere, alpaca, or hand-dyed yarn, wasting even a few extra inches on every skein quickly adds up. A small saving repeated throughout a sweater or blanket can mean having enough yarn to finish your project comfortably.
Why Does the Weaver's Knot Create Such a Secure Yarn Join?
Instead of simply tying two strands together, it creates a locking structure that becomes tighter when tension is applied. The harder the yarn pulls, the more securely the knot grips itself.
That's one of the reasons many knitters describe it as the strongest knot for yarn.
Of course, no joining method is absolutely perfect for every fiber. Very slippery yarns such as silk or bamboo may still benefit from leaving slightly longer tails or weaving them into the fabric afterward. But for the vast majority of knitting yarns, including wool, acrylic, cotton, alpaca, and wool blends—the Weaver's Knot is remarkably dependable.
When Should You Use the Weaver's Knot?
Like every knitting technique, this one shines in certain situations. I reach for it whenever I need a join that's reliable, compact, and quick to make.
It's especially useful when you're:
- joining a new skein of yarn in the middle of a project;
- working with expensive yarn and want to waste as little as possible;
- connecting two short yarn tails;
- knitting blankets, scarves, sweaters, hats, or mittens;
- crocheting garments, toys, or home decor;
- using wool, acrylic, cotton, alpaca, or most blended yarns;
- looking for a yarn join that won't come undone.
Once you become comfortable tying it, you'll probably find yourself reaching for it almost automatically.
How to Tie the Weaver's Knot Step by Step
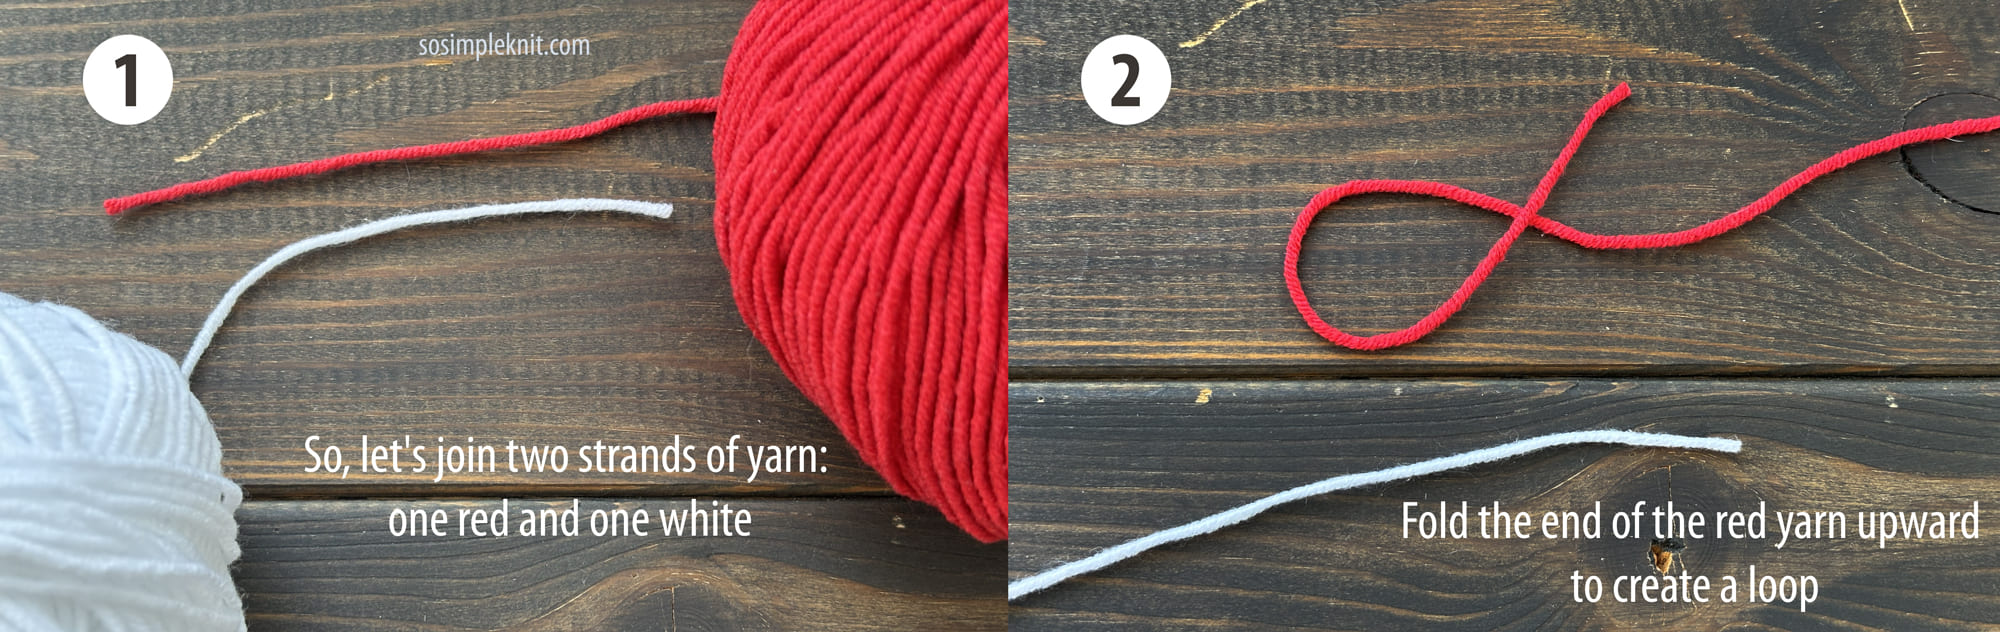
At first glance, the Weaver's Knot might seem a bit more complicated than a regular knot. Don't let that intimidate you! After tying it just a few times, the movements will quickly become second nature. To make each step easy to see, I'll use two contrasting strands of yarn: one red and one white.
Step 1. Make a Loop
Take the red yarn (the yarn you're currently knitting with) and form a small loop near the end.
Step 2. Thread the New White Yarn Through the Red Loop
Take the end of the new yarn and pass it through the loop from underneath. Next, wrap the tail of the white yarn around the red working yarn, then pass it back through the loop from top to bottom.
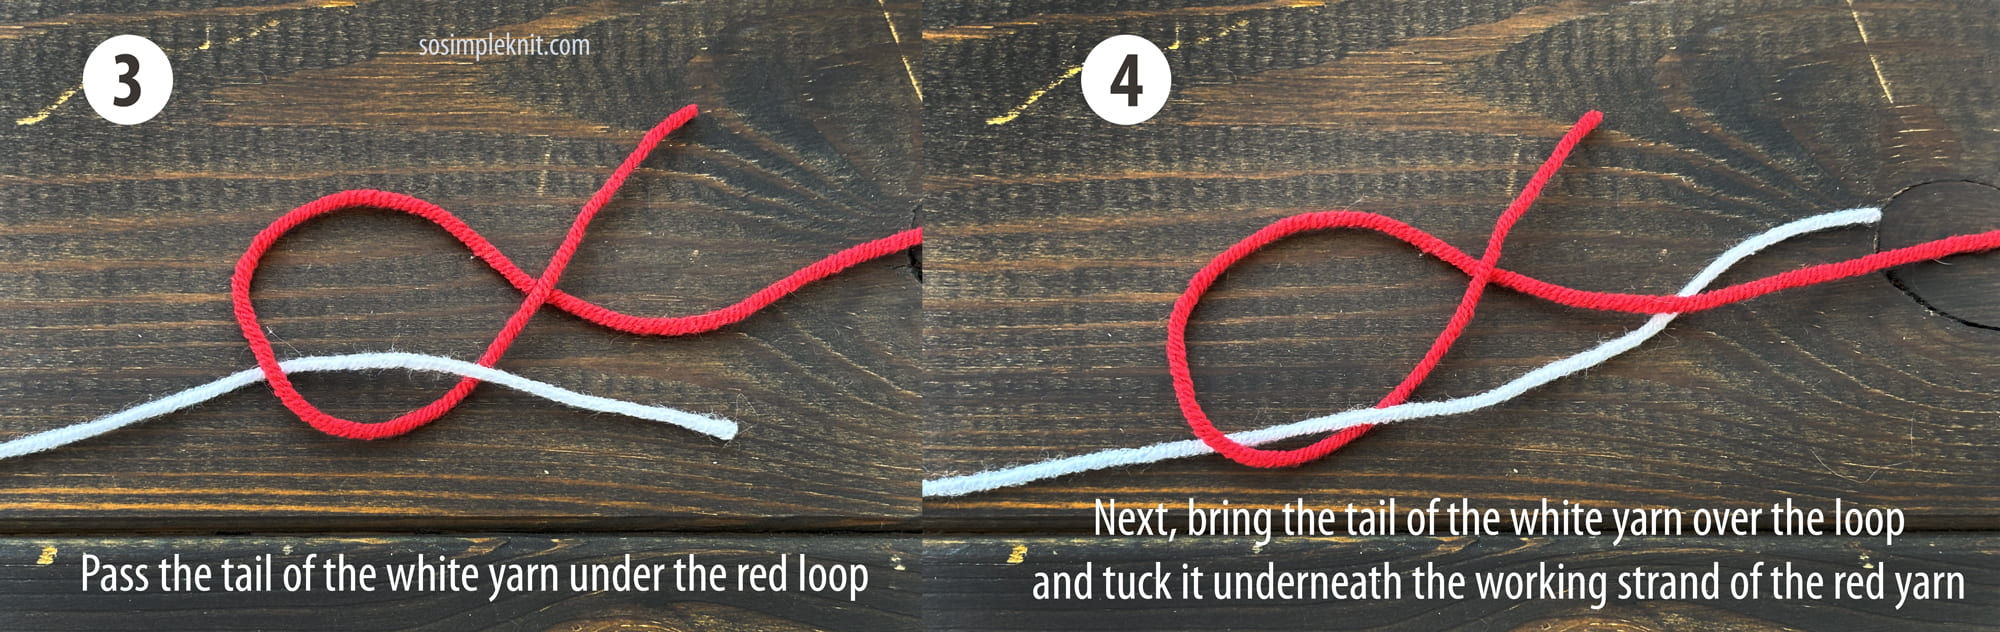
Step 3. Wrap white tail Around the Red Loop
Now wrap the white yarn around both sides of the red loop. This wrap creates the locking action that makes the knot so reliable. Hold the two working strands and gently pull them away from each other.
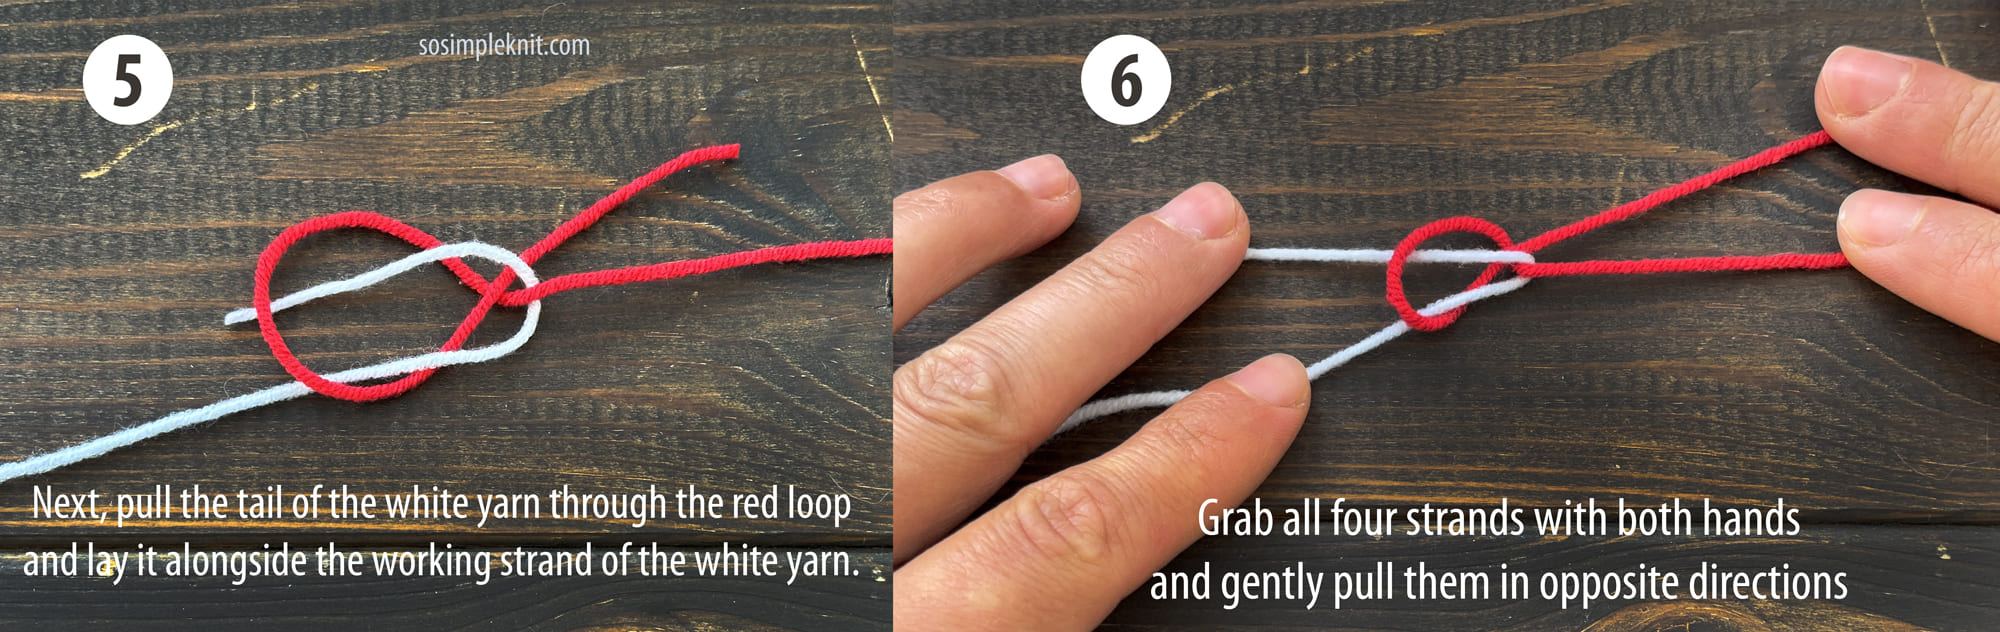
Step 4. Finally Pull the Knot Tight
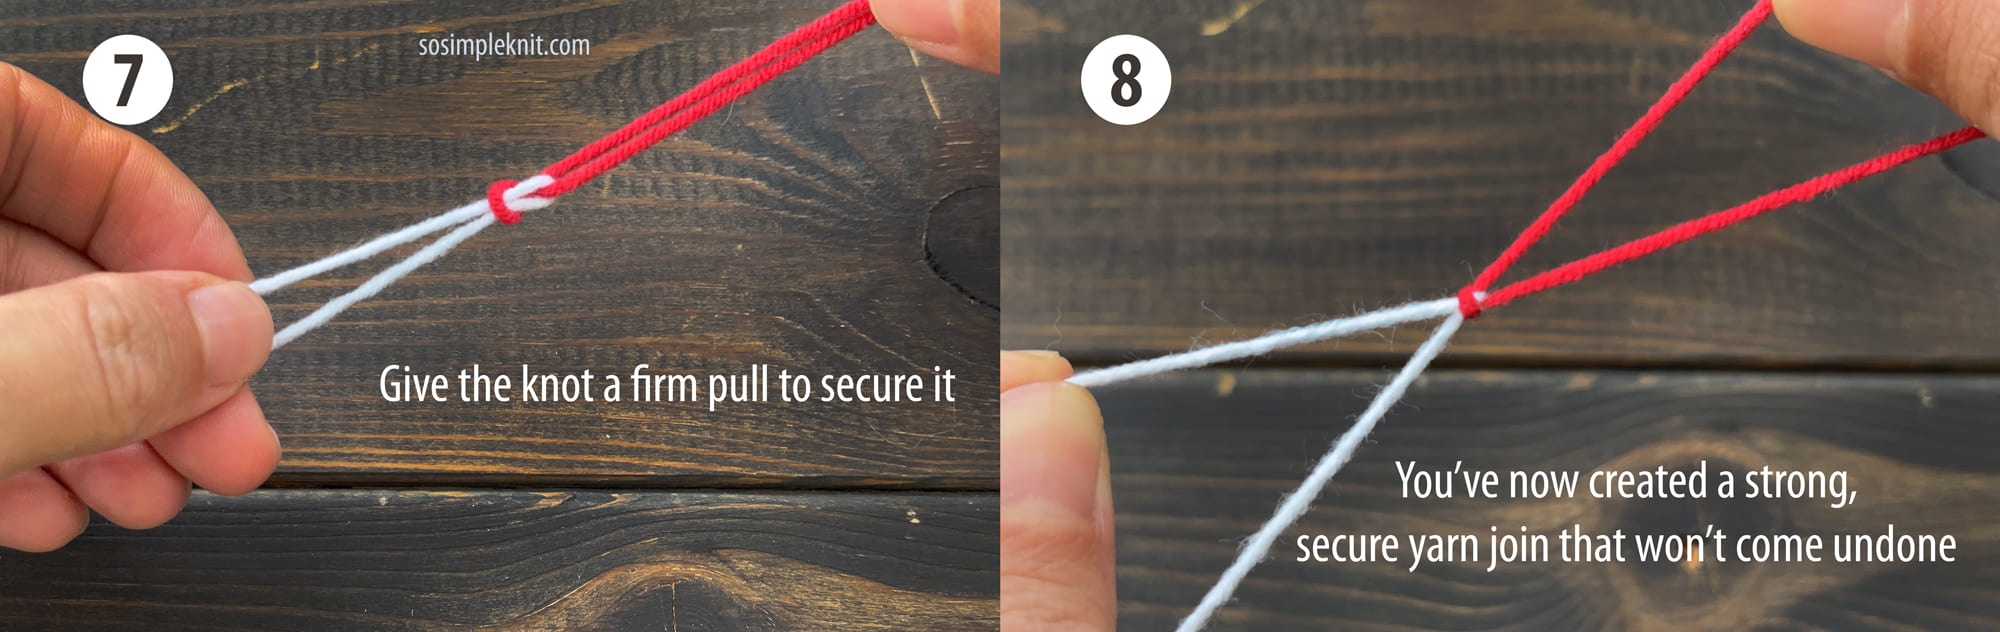
You'll see the knot tighten into a tiny, compact shape.
Frequently Asked Questions
Will the Weaver's Knot Come Undone?
When tied correctly, it's incredibly secure.
That's one of the reasons it has been trusted by weavers for generations.
Of course, no knot is completely foolproof.
Very slippery fibers like silk or bamboo may still benefit from weaving the tails into your fabric after trimming them. But for most knitting yarns, the Weaver's Knot provides an exceptionally reliable join.
Can Beginners Learn It?
Absolutely.
In fact, I think beginners learn it fast. The Weaver's Knot may look unusual at first, but after making it three or four times, it quickly becomes second nature.
Can I Cut the Yarn Tails Short?
Yes, that's one of its biggest advantages.
Unlike many other joining methods, the Weaver's Knot doesn't require long tails. That's especially helpful when you're working with hand-dyed yarn, luxury fibers, or simply trying not to waste expensive yarn.
For most wool yarns, leaving just a few millimeters is usually enough. For smoother fibers, leave slightly longer tails for extra security.
Does It Work for Crochet?
Definitely.
Although knitters often talk about the Weaver's Knot, crocheters use it just as frequently. Whether you're making blankets, amigurumi, garments, or granny squares, it's a practical way to join yarn without creating a bulky knot.
Should I Still Weave in the Ends?
If I'm knitting with wool, I often trim the tails close to the knot and continue knitting without worrying.
If I'm using cotton, bamboo, silk, or another slippery fiber, I usually take an extra minute to weave the ends into the surrounding stitches. It's a tiny bit of extra work that gives me complete confidence in the finished project.
Thank you for being here! I hope to see you again in future tutorials and blog posts.
Nataly
SoSimpleKnit.com